Digitally Visualizing Artwork in Blender
Previewing art in various frames in a simulated environment
Background
Whenever I look at other artists’ profiles, I am jealous of how clean their photos of their art with gorgeous, expensive looking frames with beautiful natural light shining on a bare, clean wall.
However, I have no such spot in my house, and no fancy camera to take crisp photos with. So using the tools that I do have, I opened Blender and whipped up a little room with bare walls, a desk with lamps and books on it, slapped a photo of my painting on a material that acted as a canvas, and made a little for that and boom!
Suddenly I had a wall on which I could ‘hang’ my art and make it look pretty.
However, the process was a bit tedious. I had to:
1) Open up Blender
2) Create a new canvas object with the correct dimensions
3) Import my picture as an image texture and apply it to the canvas material
4) Model a frame
5) Find a frame material that suits the color scheme and style
6) Render
7) Export
That’s too much setup time for what seems like a simple task.
art-viz
I have previously dabbled a little in Python for Blender, and I knew you could run blender from the command line with native arguments and custom python scripts with arguments. I figured that must be of some use to me here, and it was.
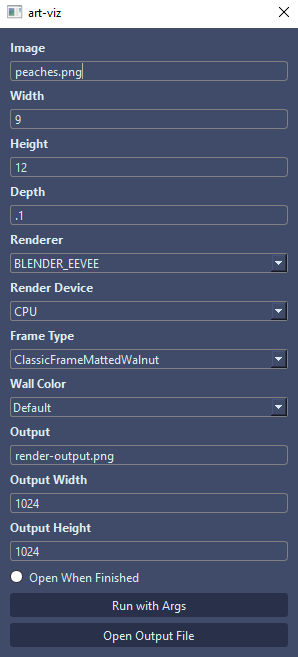
Long story short, I made a repository on github called art-viz that lets me drag an image into the root folder, run a command like:
blender -b .\art-viz.blend -P render.py -- -I .\garlic.png -W 24 -H 18 -D .5 -R CYCLES -FT BlackFloatingFrame -WC E4DED5
or I can make it even easier on myself by opening my Qt form for the command arguments with:
python renderQt.py
This opens up a decent, cleaner way to run the command from a dialog.
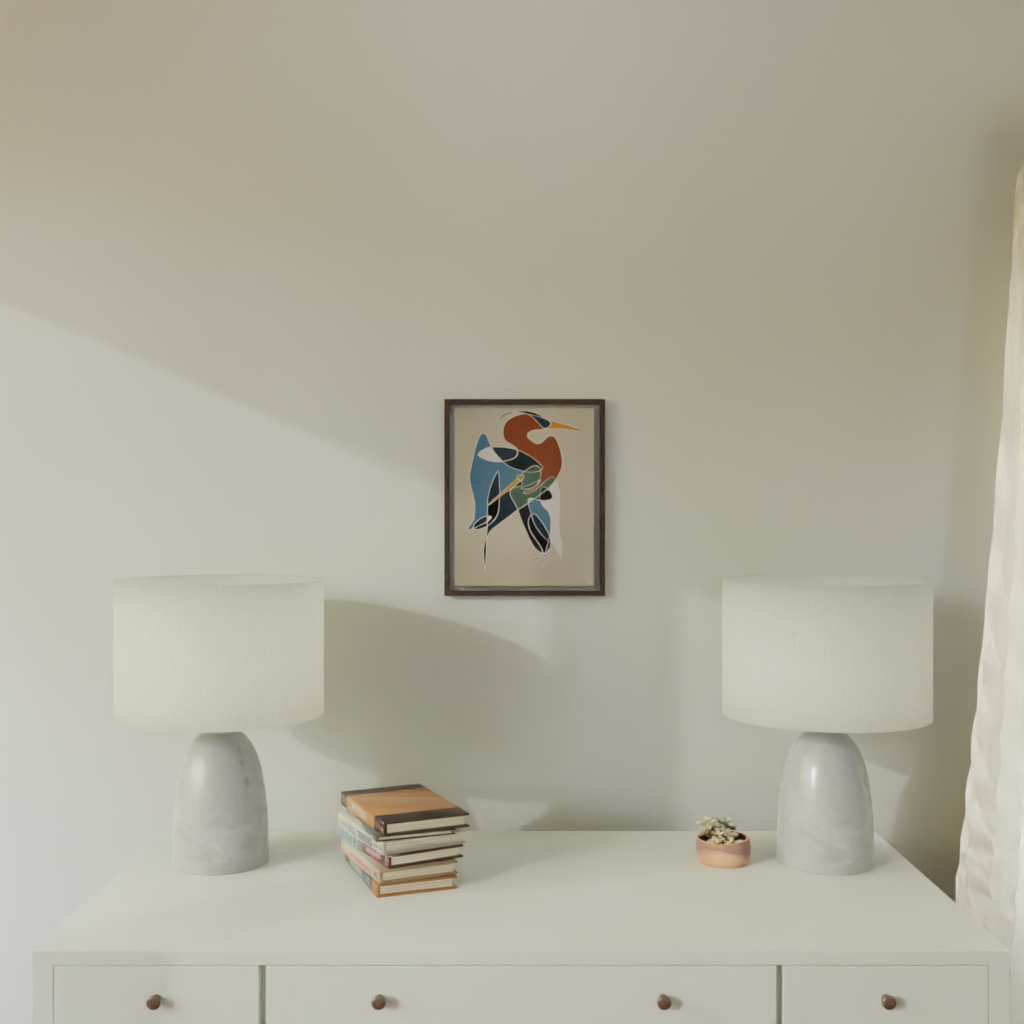
After running my command and waiting a few seconds, I’ve got a rendered image waiting for me in the same folder!
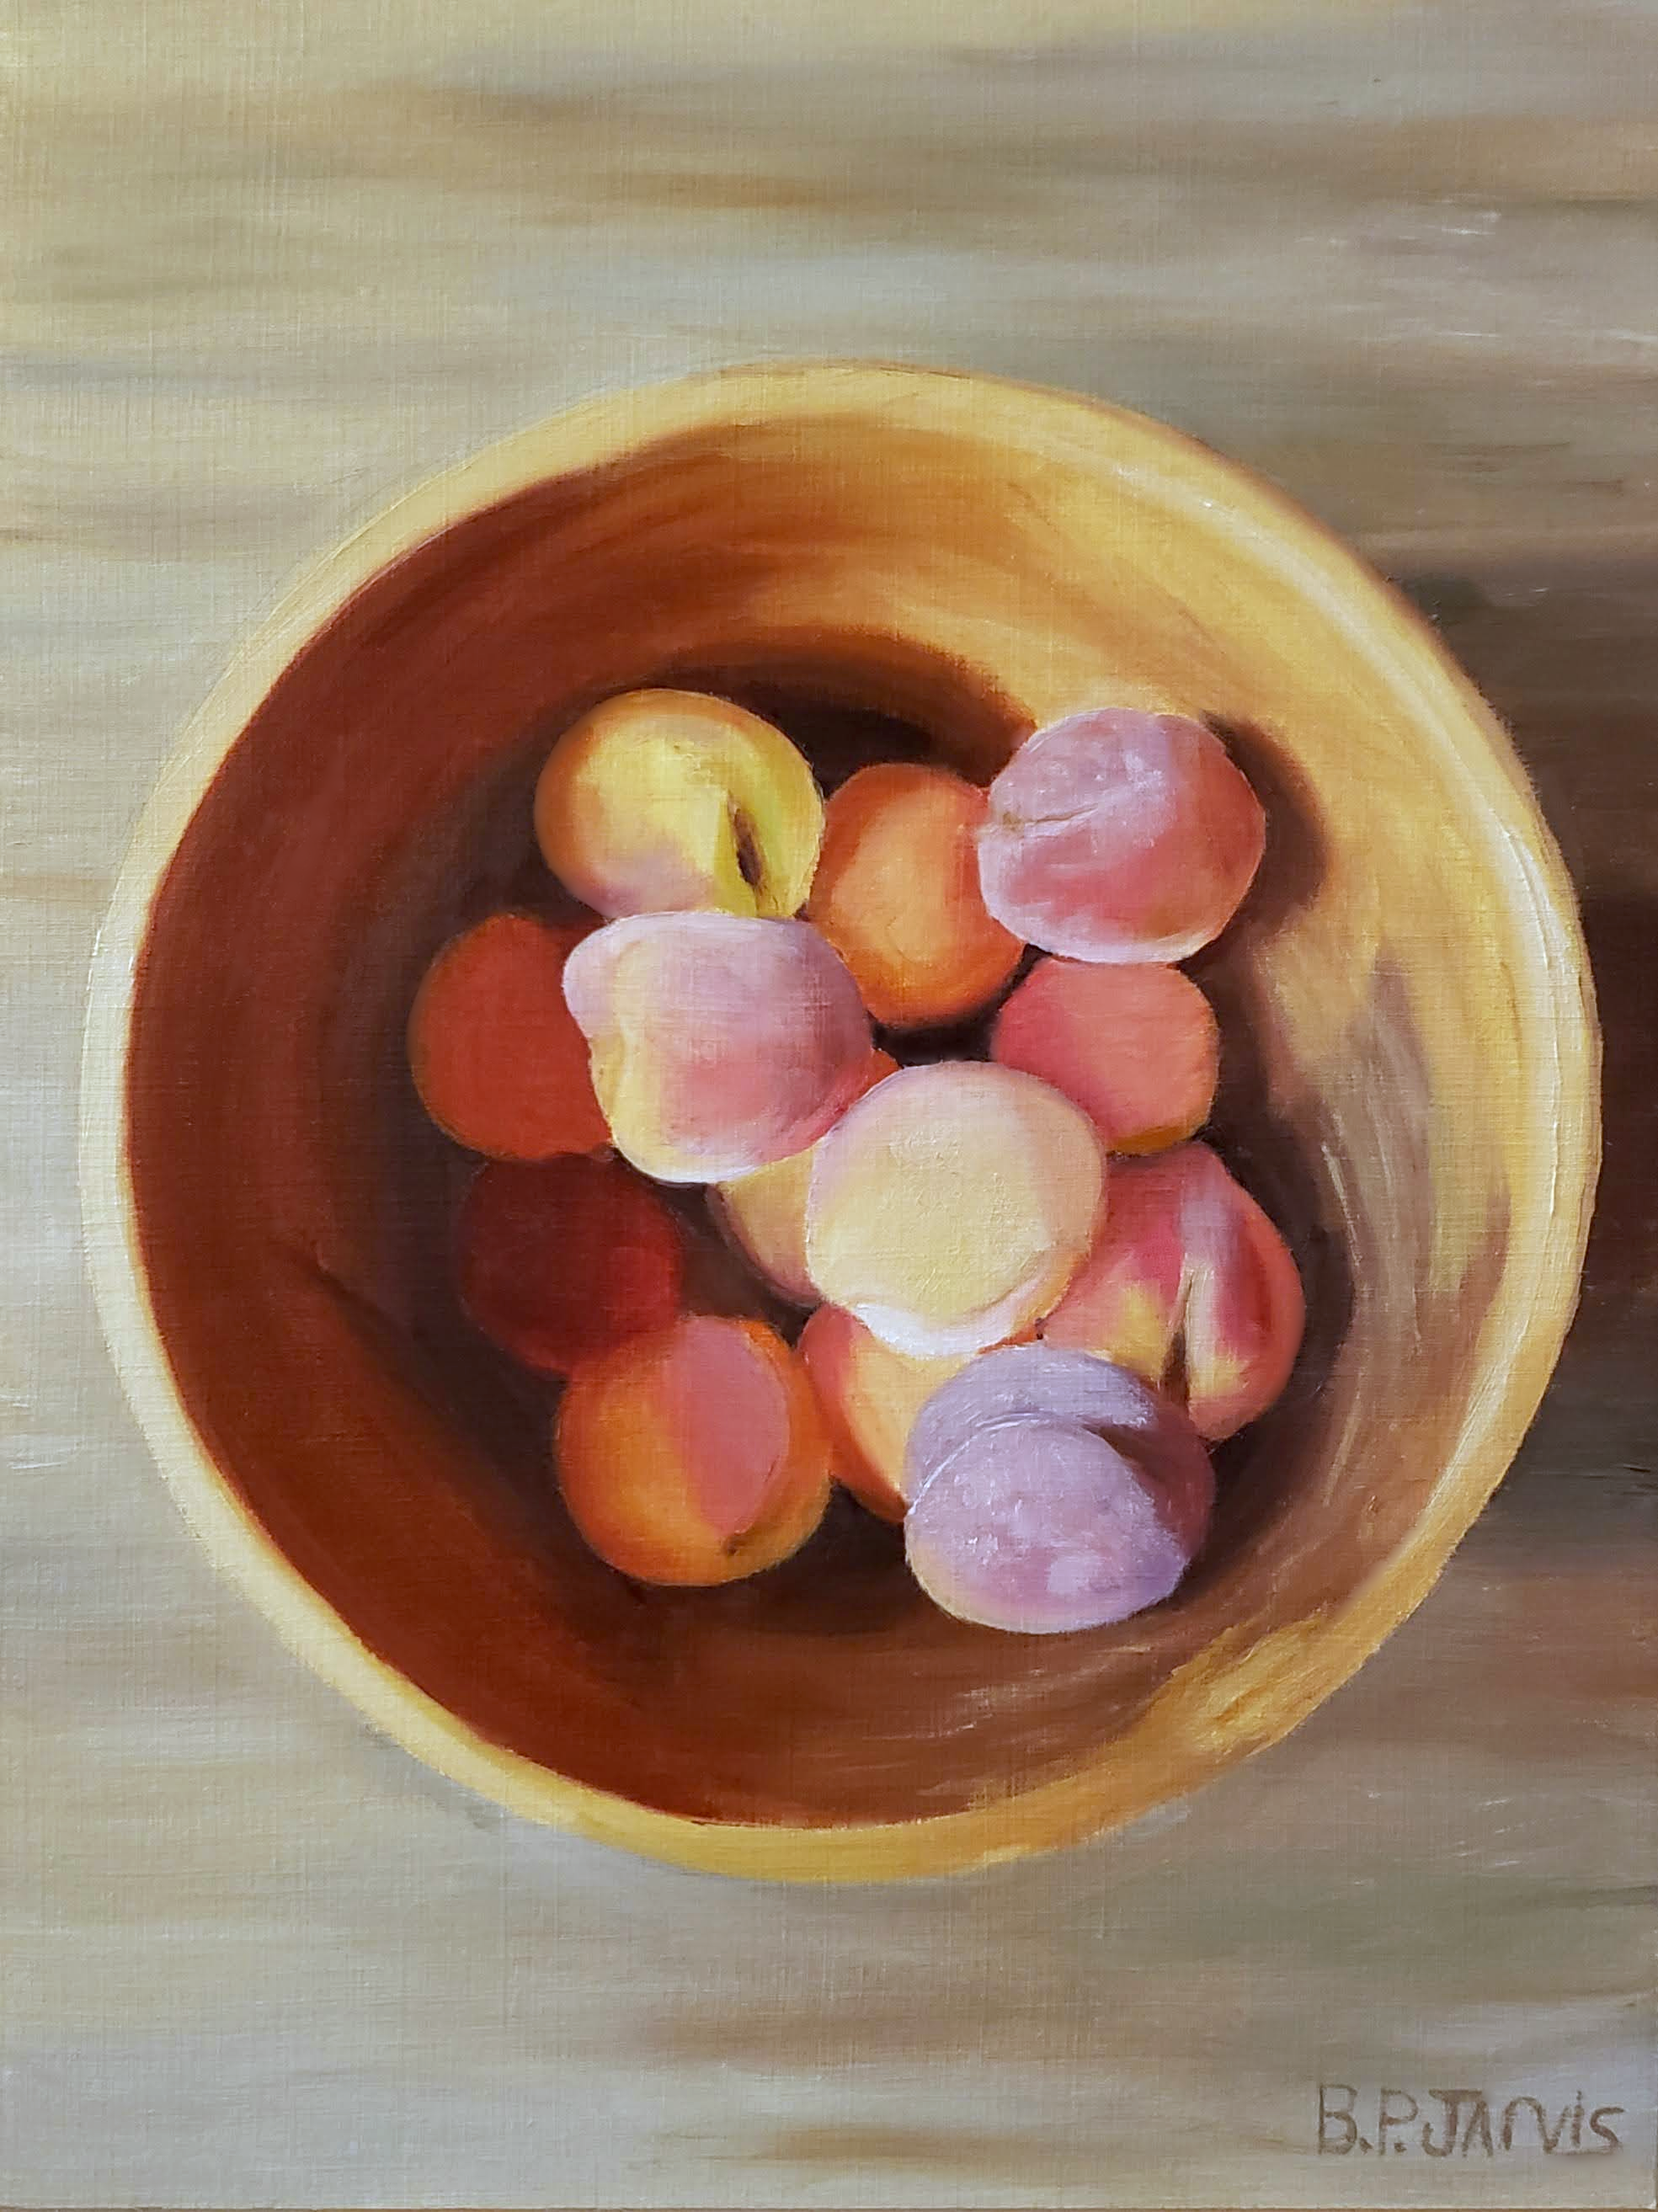
For example, here’s the input:
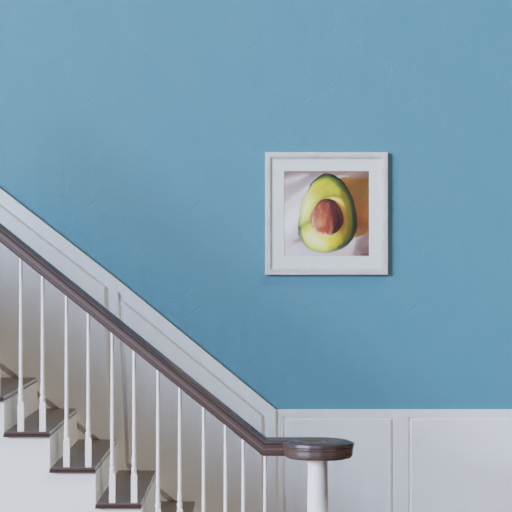
And here’s what art-viz can spit out:

Pretty neat! Now a process that could have taken me up to an hour now takes me less than a minute!
Now all it takes to preview my artwork in a frame is:
1) Open the renderQt.py script
2) Choose my original image, dimensions, & framing type
3) Click “Render”
And that’s it!
I’m hoping to add additional features soon, but in the meantime you can:
-
Set the dimensions of the hanging artwork
-
Choose from a list of frame types
-
Set the hex color of the wall material
-
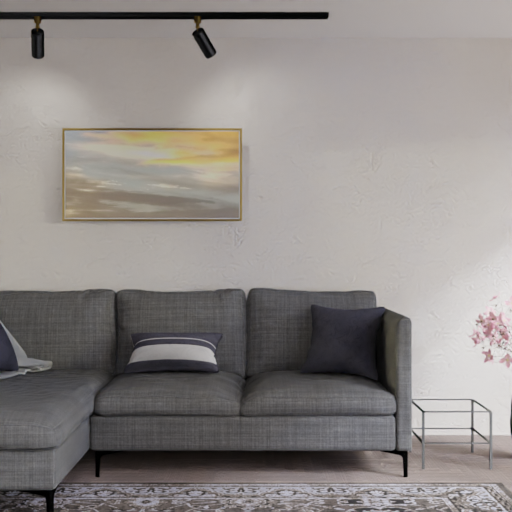
Choose an environment other than the default wall:
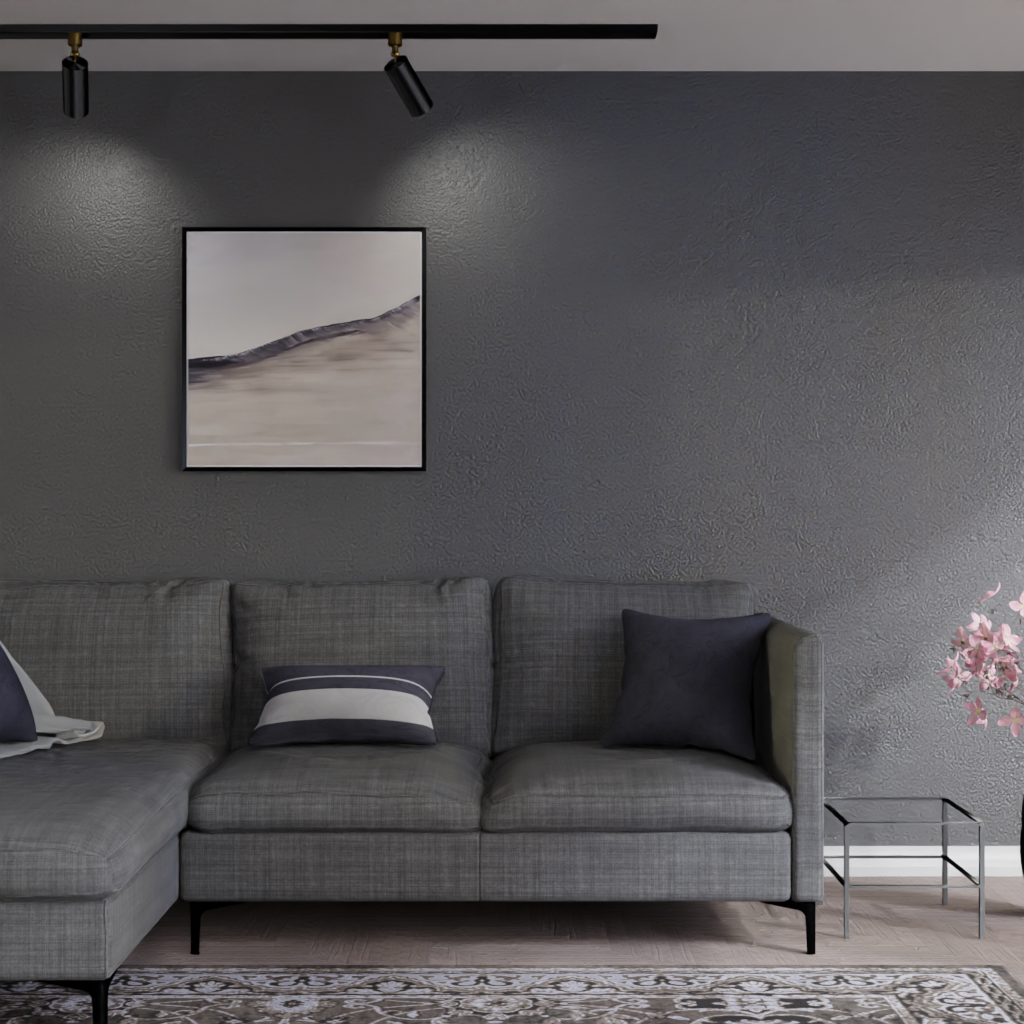
You can still change the wall color, frame type, etc. no matter the environment, and even create your own!
See the repository here!