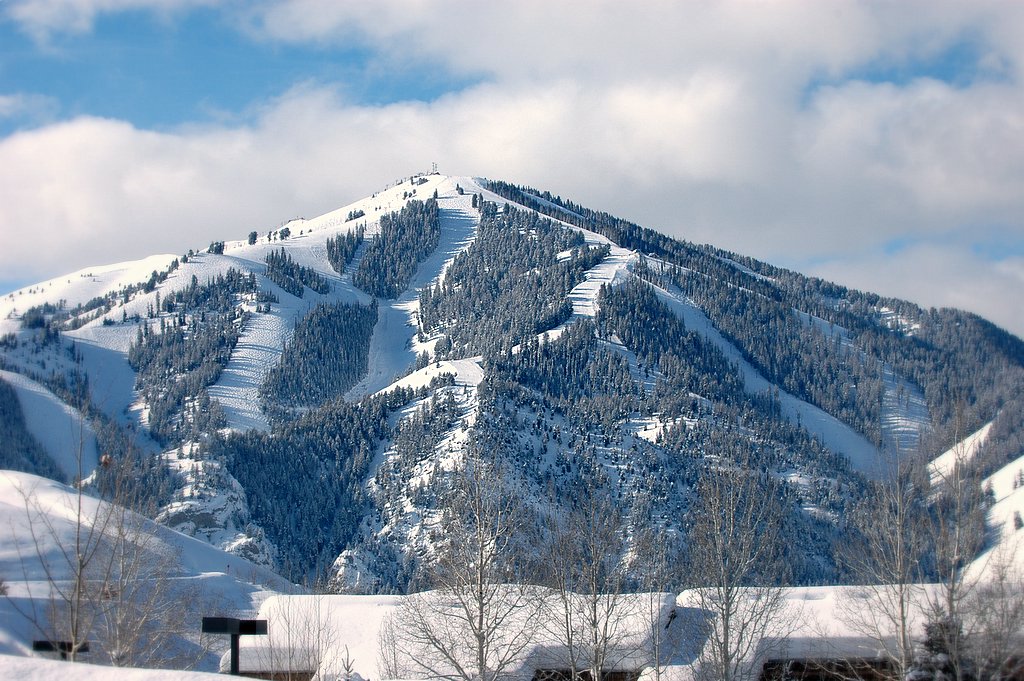
Bald Mountain Model
Now this was – and still is, as I keep iterating – a special project for me.
Sun Valley, Idaho has held quite an extraordinary place in my family’s heart. Much of my childhood was spent there, my grandparents lived there for years, and my parents still spend most of their winters there.

Bald Mountain, Idaho
Modeling
Last winter, I was learning more about GSA data and importing real-world terrain maps into Blender and visualizing maps in 3D.
In tandem with this, I was also getting more comfortable with my little cheap Monoprice 3D printer. Naturally I had the idea to convert the terrain models I was tinkering with in Blender to the real world. I decided to start with an iconic (to my family, at least) shape, Bald Mountain (or “Baldy”), as I thought it might be a neat Christmas gift.
The sheer amount of polygons required to get a clear, detailed, recognizable mountain was quite shocking – at least to my poor little laptop’s CPU. But even with as much detail as my computer could handle, you’d be hard-pressed to find anyone who could look at that shape and know it for what it is, other than a generic-looking mountain peak. This is because it’s not the shape of the mountain that people recognize, it’s the trees – or lack thereof. The trail shapes are really what make a mountain face recognizable. Kind of like how it would be difficult to recognize anyone if they didn’t have any facial features…
So then came the most tedious part. I decided I would extrude faces of the mountain for all areas that were covered by trees. The remaining faces of the ski-able slopes would look like runs were carved out of the mountain face.
So I loaded up a few touristy images of the mountain, matched their perspective in Blender’s 3D view as best I could, and I painted. Where my brush landed on the model, white was applied to a mask that was mapped to the mountain’s UV’s. Then I could use that mask to displace the appropriate faces vertically. The result was something like a tree-line, and I was satisfied.
Printing

The sliced model ready to be printed
Printing the mountain was easy as ever (I love living in the future). The printer does all the work for me!

Granted, I did have to make a few adjustments after the first print, as the tree line mask needed to be a little more pronounced than I initially thought, as the 3D printer can only handle so much fine detail.
Molding
Those prints did nicely as little gifts to my parents (hi, Mom!). However I was not satisfied yet.
3D printing is wonderful, but for visual arts there is much left to be desired. Sanding down the PLA can only do so much – it still looks like it was printed. I wanted a bit more polish.
A friend of my wife had recently introduced me to resin art – which I found fascinating. That combined with some well-timed advice from a coworker with more crafting and plastics experience led me to Tap Plastics, where I was able to fully form a plan to convert this little 3D printed model to a different medium.
Long story short, after a few coats of sand-able primer, I was to make a pretty smooth silicone mold of the model.

After 3 coats of primer, sanded smooth

Final silicone mold
Casting
After that it was as simple as pouring a little dyed resin and waiting a few days…

Waiting for resin to cure
And voila!

From bleh white PLA to a nice clear blue! After a bit of sanding to get the edges and bottom to a nice smooth finish, I’m pretty satisfied!
Up next is green:

Hot off the mold – pretty smooth!

Orange! Not bad.